
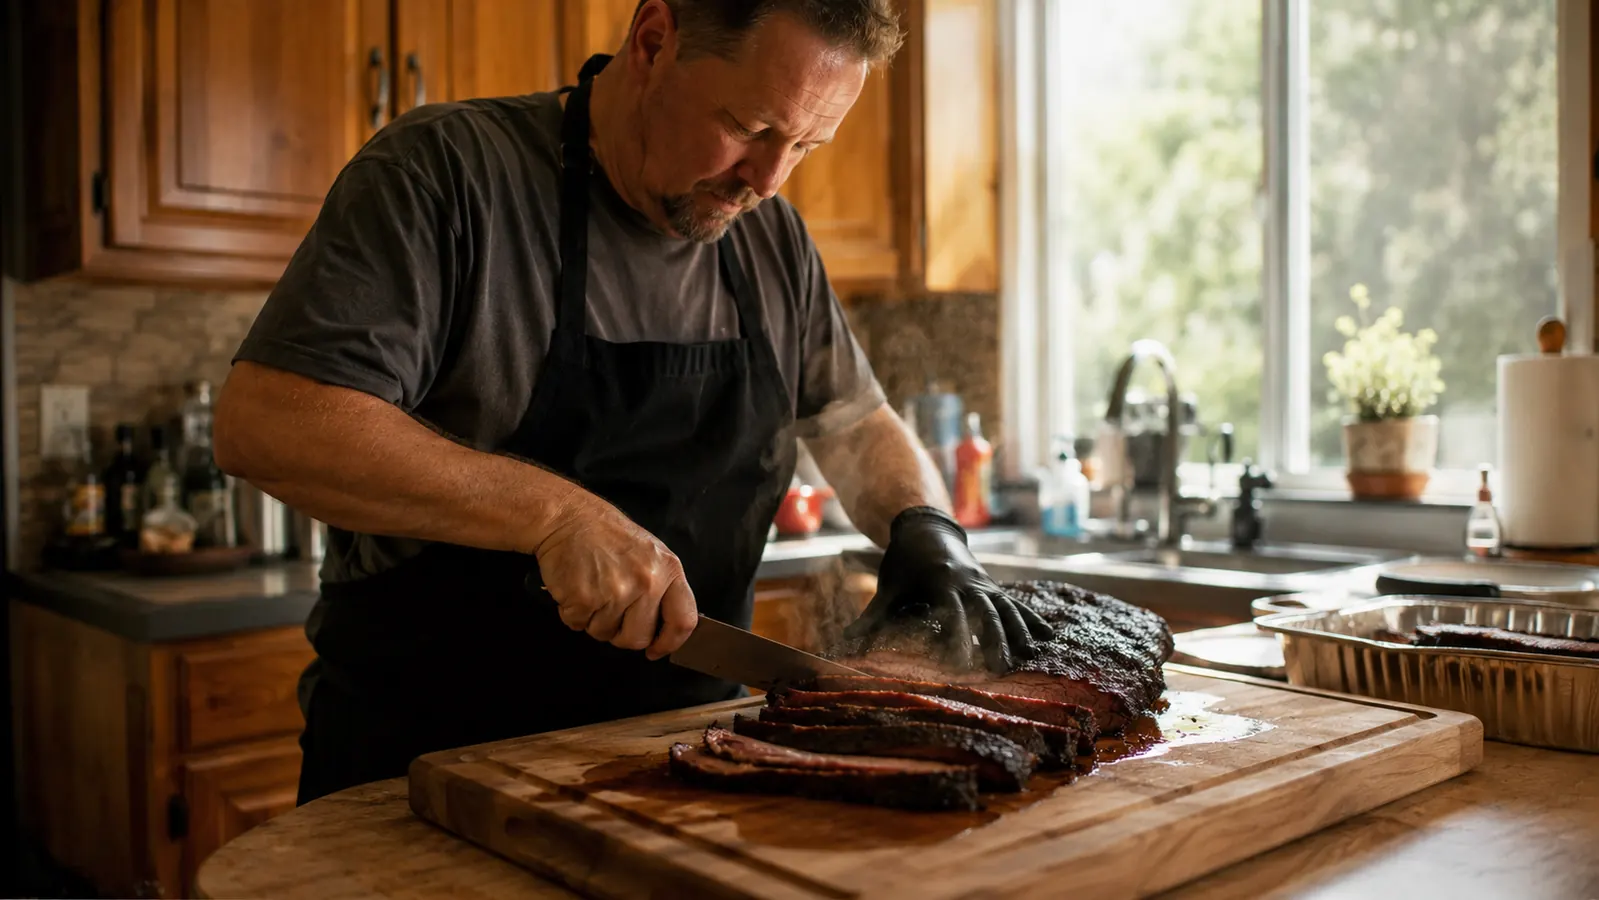
The first time I carved a brisket without a real carving board, I ruined the point end pushing all that hard-won juice straight onto the granite counter. My wife Carol still brings it up at Thanksgiving. That was six years and a lot of smoked briskets ago, before I started using a ROYAL CRAFT WOOD bamboo board with a deep juice groove around the edge, and it changed how carving night goes at my house.
A 14-hour brisket deserves better than getting sliced on a board with nowhere for the juice to go. This is the exact method I use every time now, from the moment the brisket comes off the smoker to the moment the platter hits the table, so you keep the bark, keep the moisture, and don't spend the next twenty minutes wiping tallow off your counter and cabinet doors.
I've carved brisket on plastic cutting boards, on cheap wood boards with no lip at all, and on a couple of platters that were never meant to hold a knife in the first place. None of it compares to slicing on a board built for exactly this job. The groove alone has saved me from more than one ruined countertop, and it makes the difference between a brisket that looks like it belongs on a magazine cover and one that looks like it survived a small kitchen accident.
Stop Losing Your Brisket's Juice to the Counter
A cutting board with a shallow groove or no groove at all just can't hold what a good brisket puts out. This bamboo board's deep juice groove is built to catch it all, so you can spoon it right back over the meat.
Amazon Check Today's Price on Amazon →Step 1: Let the Brisket Rest Before You Even Pick Up the Knife
I know it's tempting to cut into a brisket the second it hits the counter, especially when the whole house has been smelling like smoke and beef tallow since four in the morning. Don't. Wrap it in the butcher paper it came off the smoker in, or a couple layers of foil, and let it rest a minimum of 30 minutes. An hour is better, and I've gone as long as ninety minutes on a big 14-pound packer without any trouble.
I keep mine in a cheap cooler with a towel on top, no ice, just as insulation to hold the heat while the meat settles. That resting period is when the muscle fibers relax and pull the juice back in instead of letting it all run out the second you slice. Cut too early and you'll watch a puddle form on your board before you've even gotten through the flat.
I learned this the hard way at a church potluck where I was rushing to beat the serving line, and half my brisket ended up dry by the time it hit people's plates. Nobody said anything, but I could tell by how fast the potato salad disappeared compared to my brisket that something wasn't right. Now I'd rather serve fifteen minutes late with a juicy brisket than right on time with a dry one.
Step 2: Set Up Your Board and Find the Grain
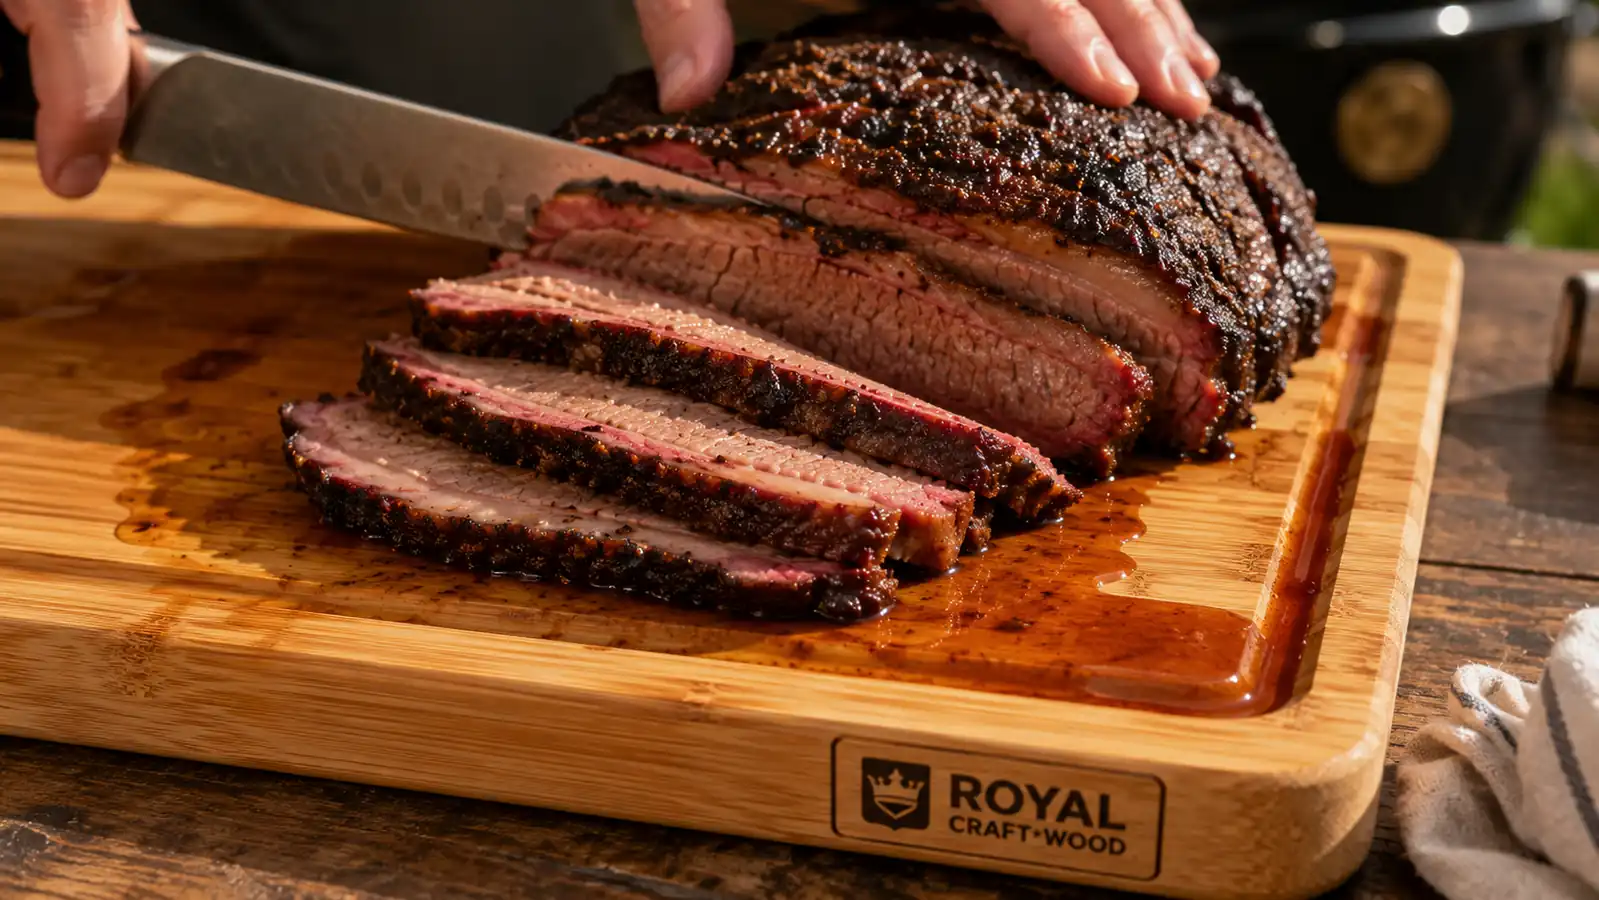
Set your carving board on a damp kitchen towel before you put the brisket down. This keeps the board from sliding around on the counter while you're cutting, which matters more than people think when you're working with a knife this long, especially once you've got a hot brisket and a groove full of liquid adding weight to one side.
Place the brisket with the groove positioned so it runs the length of where you'll be slicing, not off to the side where it can't catch anything useful. On the ROYAL CRAFT WOOD board I use, the groove runs the full perimeter, so I just make sure the brisket sits centered with enough room on all sides for the juice to actually run downhill into it.
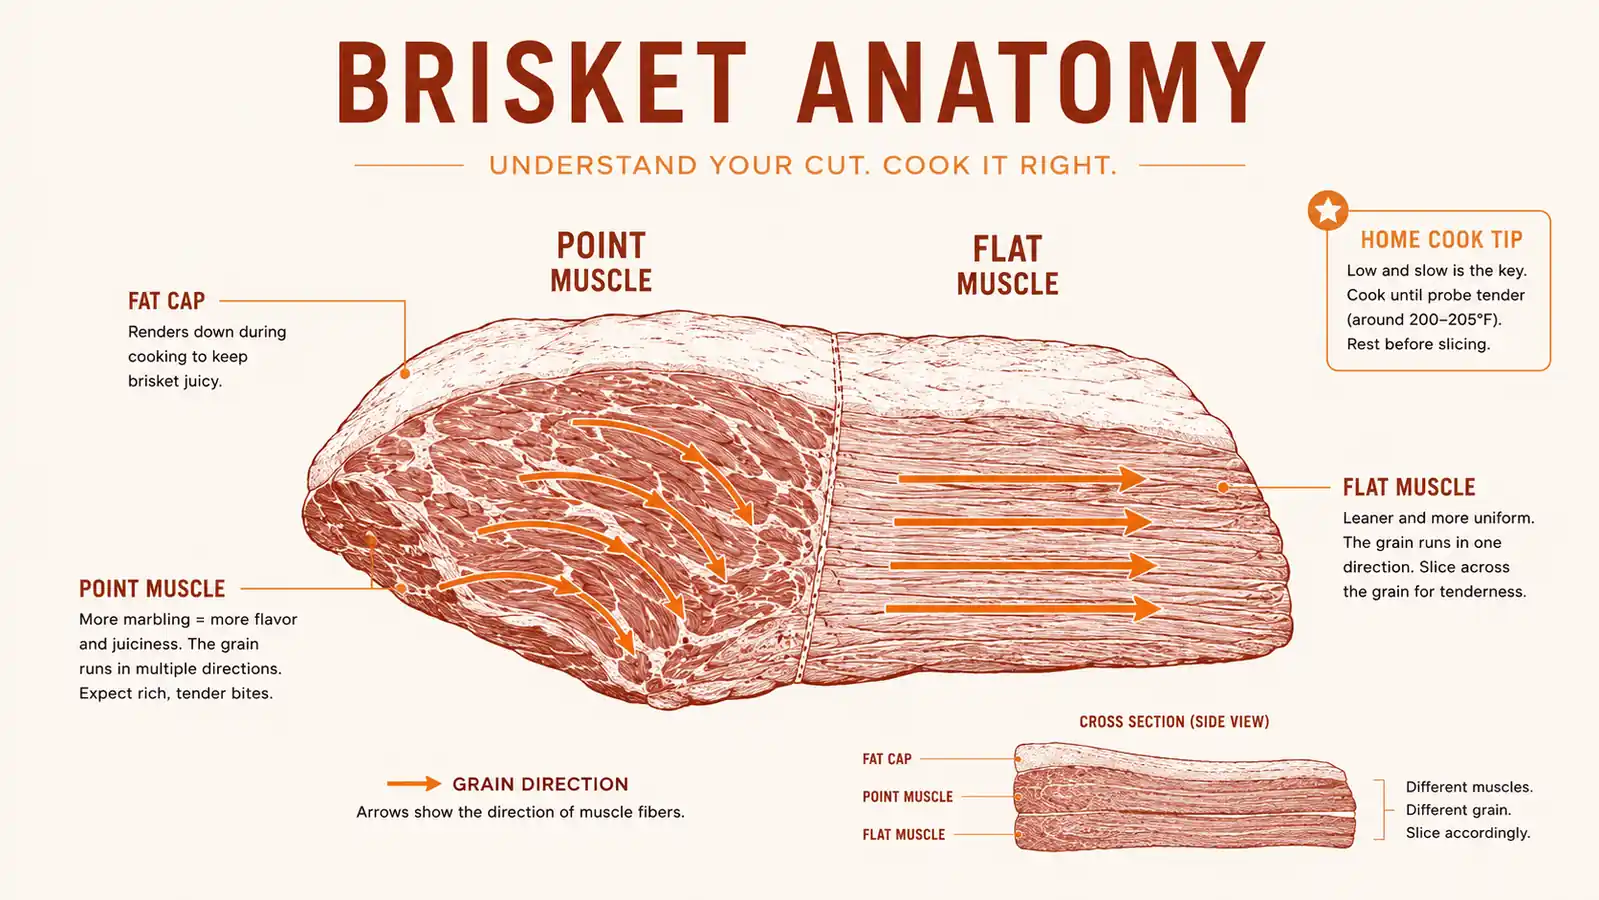
Before the first cut, take thirty seconds to actually look at the meat. A whole packer brisket has two muscles, the flat and the point, and the grain runs in different directions in each one. You want to spot where those grain lines shift before you start cutting, not after you've already sliced the wrong way through half of it and ended up with pieces that shred instead of holding together.
Step 3: Make the First Cut, Separate the Point from the Flat
Find the seam of fat that runs between the point and the flat, usually about two-thirds of the way down the brisket. Cut straight through that seam to separate the two muscles into their own pieces. This single cut is the one that trips people up most, because if you skip it and just start slicing across the whole brisket, you'll be cutting with the grain on one end and against it on the other.
Once separated, you've basically got two smaller carving jobs instead of one confusing one. I set the point aside on the far end of the board while I work through the flat first, since the flat is what most of your guests will actually get served, and it holds its slice shape better while it's still warm.
Don't rush this cut. Take your time finding that seam, and if you're not sure exactly where it is, look for the spot where the grain direction visibly changes on the surface of the meat. That's your line. A clean separation here sets up every slice that comes after it.

Step 4: Slice Against the Grain in Pencil-Width Pieces
For the flat, slice against the grain in pieces about the width of a pencil, roughly a quarter inch. Use a long slicing knife and let it do the work in a smooth back-and-forth motion, don't saw straight down or you'll tear the bark instead of cutting through it cleanly. Thinner slices from the flat are more tender to chew since you're cutting straight through those long muscle fibers instead of along them.
The point is fattier and the grain runs a different direction, so I'll either slice it a little thicker, about the width of two pencils, or cube it up for burnt ends if that's what the crowd wants. At a reunion last summer I did both off the same brisket, thin slices from the flat for the older folks and cubed burnt ends from the point for the teenagers, and both trays were empty before the potato salad.
Work in short sections rather than trying to slice the whole flat in one long pass. It's easier to keep your grain direction straight and your slices even that way, especially once the shape of the flat starts tapering toward the thin end and the grain can shift slightly again.
If a slice starts to fall apart in your hand, that usually means you've drifted with the grain instead of against it, or you rested the brisket too short a time. Stop, rotate the piece, and check the grain direction again before you keep going. It happens to everybody now and then, even after years of doing this.
Step 5: Let the Juice Groove Do Its Job, Then Use What It Catches
This is the whole reason a proper carving board earns its keep. As you slice, the juice and rendered fat run off the meat and pool in the groove around the edge of the board instead of soaking into your countertop or running onto the floor. On this ROYAL CRAFT WOOD board that groove is deep enough to hold a real amount of liquid, even off a brisket that's been sitting in tallow all night.
Don't let that liquid go to waste. I keep a small ladle or a big spoon next to the board and spoon that jus right back over the sliced meat before it goes out to the table, or pour it into a little bowl for people to drizzle over their own plate. That groove full of drippings is basically free au jus, and it's the difference between brisket that tastes like it just came off the smoker and brisket that tastes like it's been sitting out for an hour.
At bigger gatherings I'll pour off the groove into a warm gravy boat halfway through carving so it doesn't overflow onto the counter once the board fills up, then keep collecting more as I finish the rest of the brisket. By the end you've usually got close to a cup of pure beef drippings that would otherwise be soaked into a paper towel.
A brisket you smoked for fourteen hours deserves better than a plastic board that lets every drop of that juice run straight onto your counter.
What Else Helps
A sharp slicing knife matters almost as much as the board. I use a 12-inch granton-edge slicer and touch it up on a whetstone before every big cook, since a dull knife tears bark no matter how good your board is. Keeping that damp towel under the board the whole time you're carving stops a lot of accidents, especially once the groove starts filling up and the board gets a little heavier on one side.
I also keep a second, smaller board nearby for anything that isn't the brisket, like slicing bread or cutting up onions for the sauce. It keeps my main carving board dedicated to just the meat, so the groove stays clean and I'm not scrubbing off onion smell before I plate the brisket.
After the meal, I hand wash the board with warm water and mild soap, dry it standing up so air gets to both sides, and rub in a little food-safe mineral oil every few weeks to keep the bamboo from drying out and cracking. Treat it decent and a board like this will outlast a lot of the other gear in your kitchen, brisket season after brisket season.
One more small thing that helps, warm the board slightly before you set the brisket down, either by running it under warm tap water and drying it or just letting it sit near the stove for a few minutes. A cold board pulls heat out of your brisket faster than you'd think, and warm slices hold together and slice cleaner than ones that have started to cool and firm up.
Size matters too if you're cooking for a crowd. A full packer brisket runs long, and a board that's too small means the point end hangs off the edge with no groove underneath it to catch anything. I went with a bigger ROYAL CRAFT WOOD board specifically because most of my cooks are for fifteen to twenty-five people between family and church folks, and a cramped board just means more juice missing the groove entirely.
Give Your Next Brisket a Board That Can Actually Hold the Juice
You put in the hours smoking it low and slow. Don't hand it off to a cutting board that lets all that juice go to waste on your countertop.
Amazon Check Today's Price on Amazon →